DIY · été
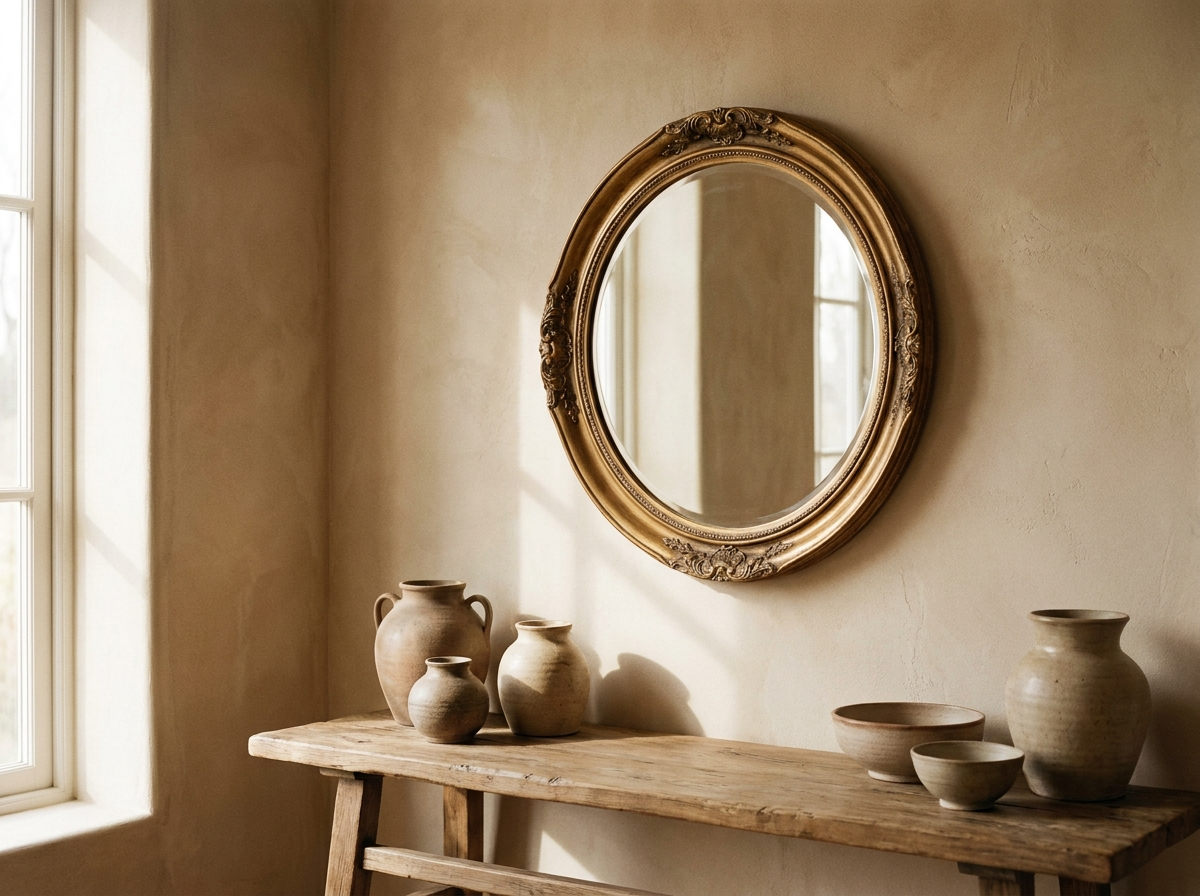
The caned headboard that transforms a bedroom
 Reference tutorialCastoramaSee the tutorial →
Cane webbing is the detail that makes a whole bedroom: warm, light, hugely on-trend. A real rattan headboard is expensive; this one takes an afternoon to build for a fraction of the price. On each diagram below, the highlighted zone shows the current step.
What you need
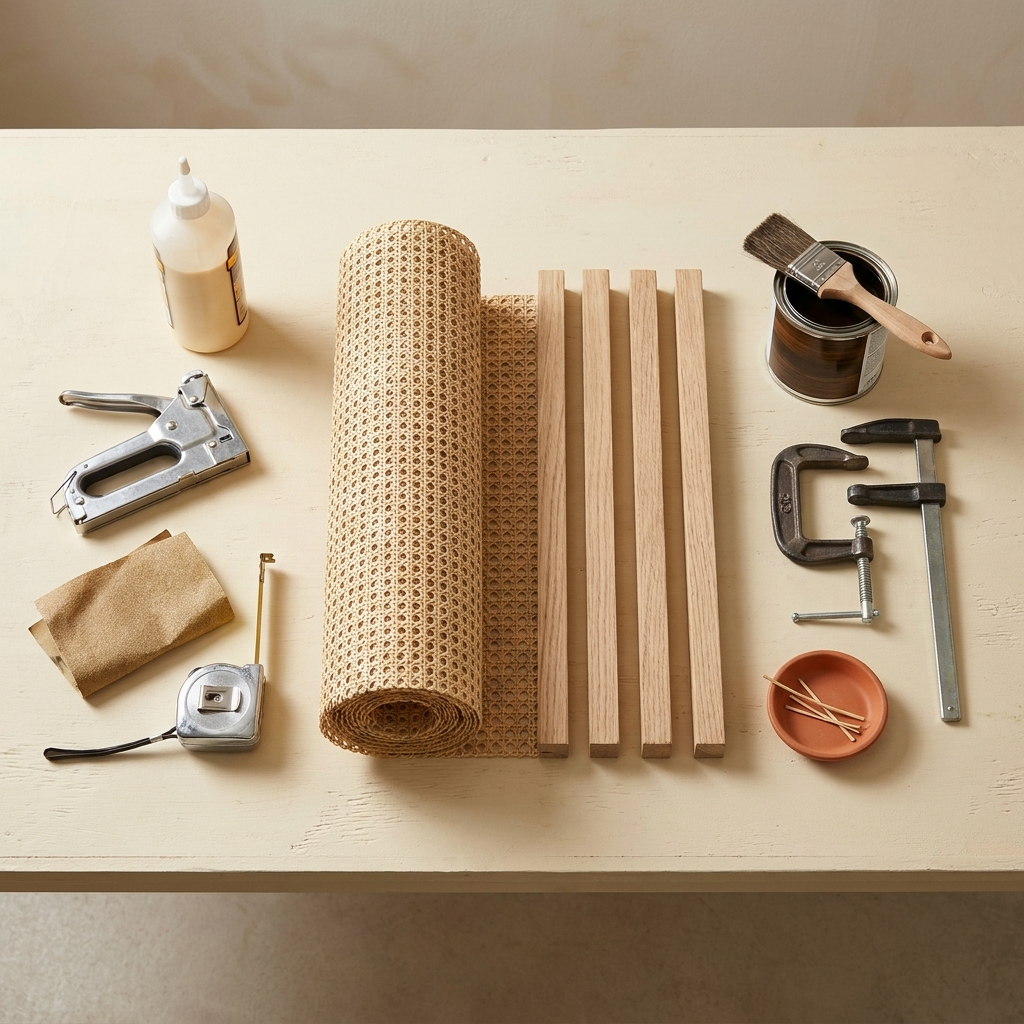
- Cane webbing roll (woven rattan), ~1 m² (~€20)
- 4 wooden slats for the frame (~€12)
- Wood glue + staple gun (and staples)
- Assembly screws or brackets
- Sandpaper + wood stain or oil (optional)
- Tape measure, pencil, saw (or cut in store)
Step by step
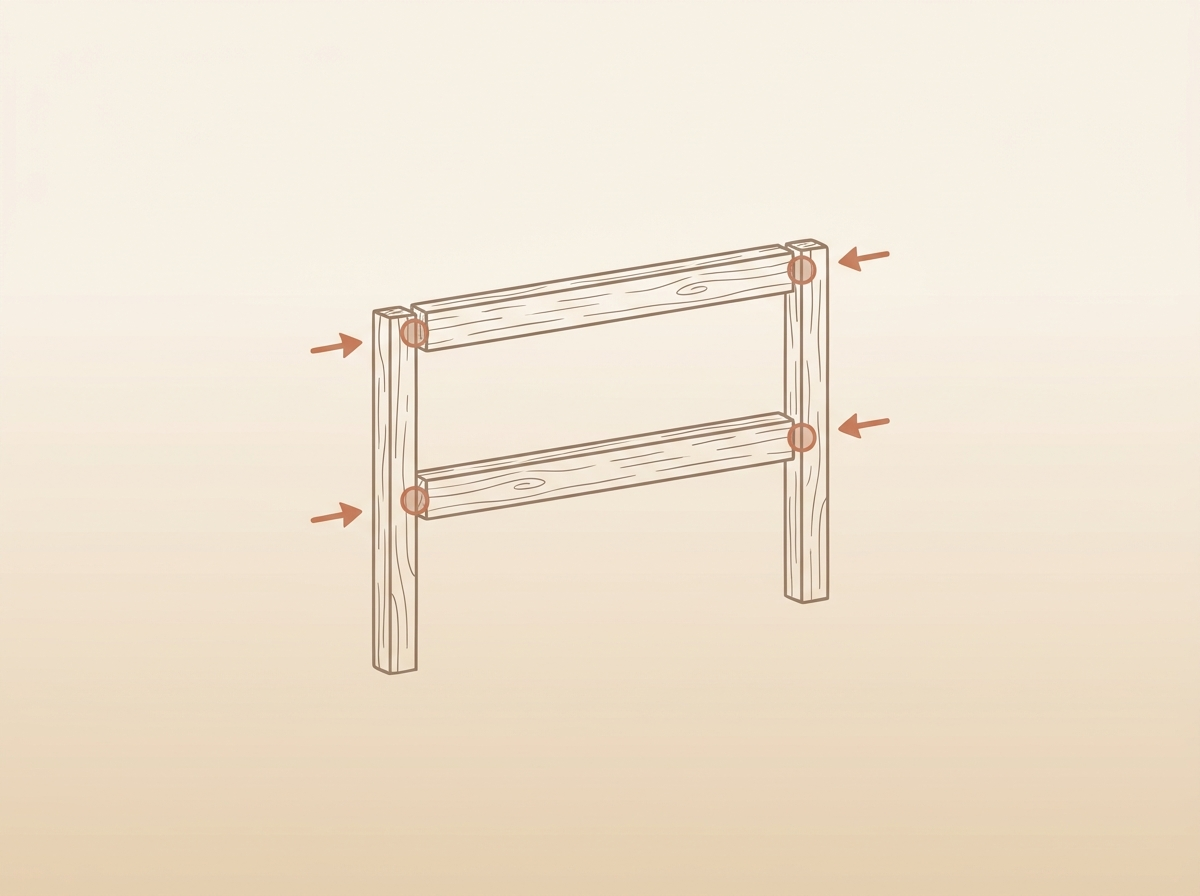
Build the wooden frame
Cut 4 slats to your bed's width and assemble them into a rectangle (screws or brackets at the corners). Check it's square: a skewed frame will show once on the wall. Sand the edges.
Stretch the cane over the frame
Soak the cane webbing for 20-30 min in warm water: it softens and will tighten as it dries. Lay it over the frame opening, pattern straight, and stretch it gently and evenly.
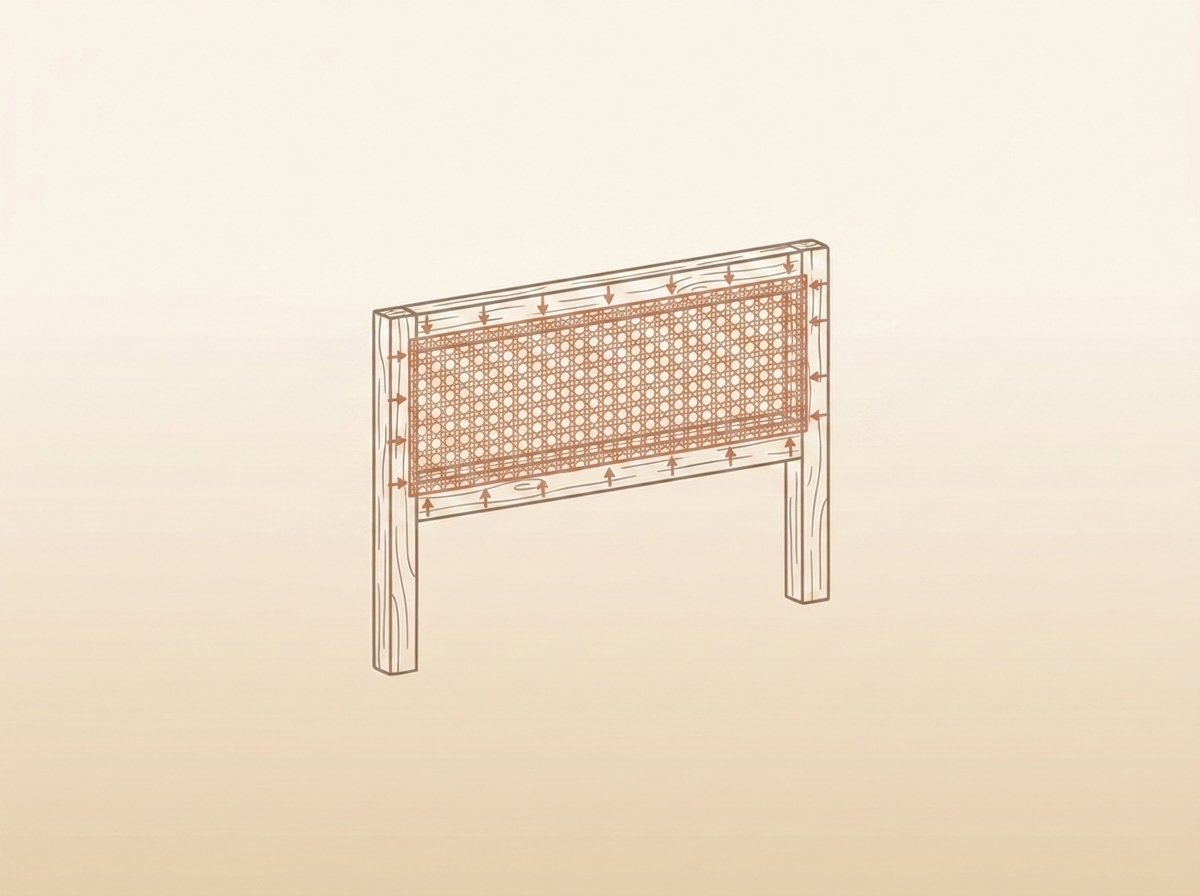
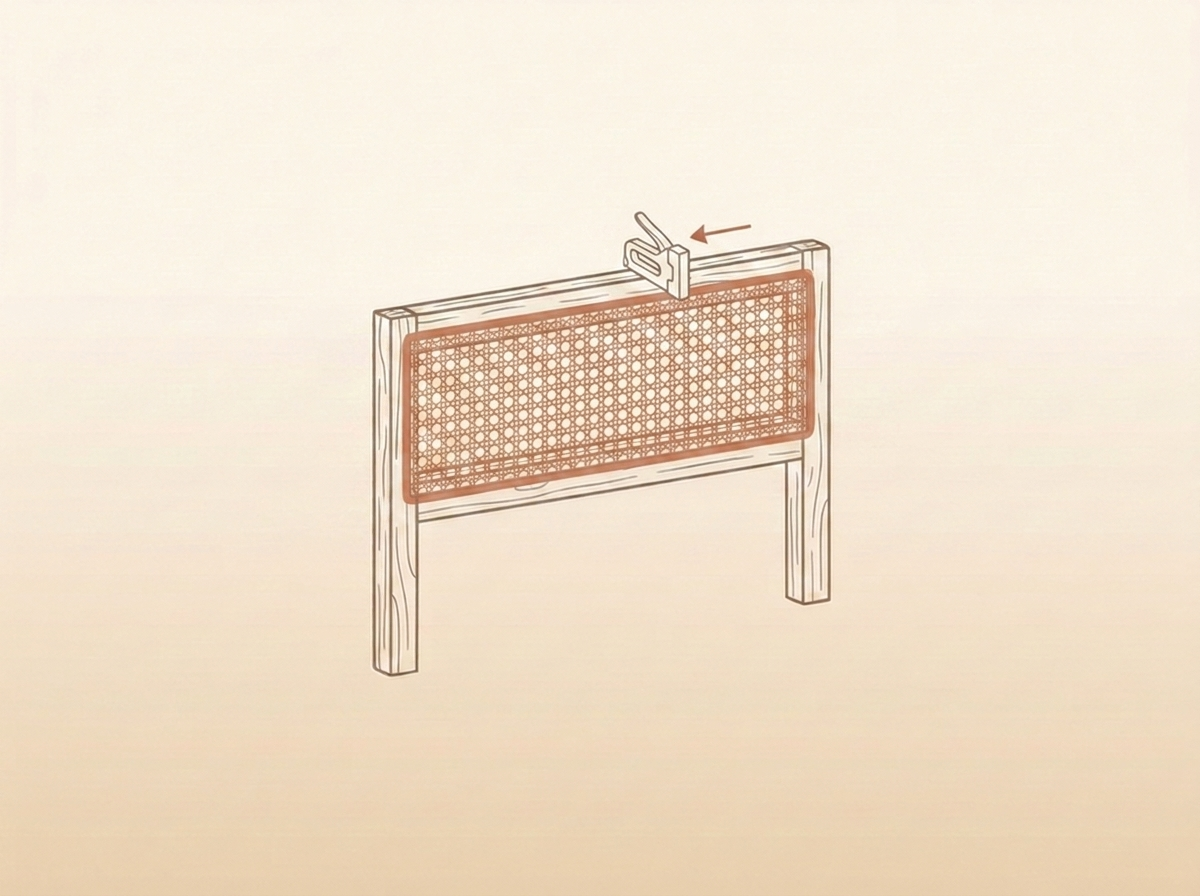
Staple at the back, taut
Staple the cane to the back of the frame, starting from the middle of each side then towards the corners, keeping it taut as you go. As it dries the rattan tightens by itself. Trim the excess with a knife.
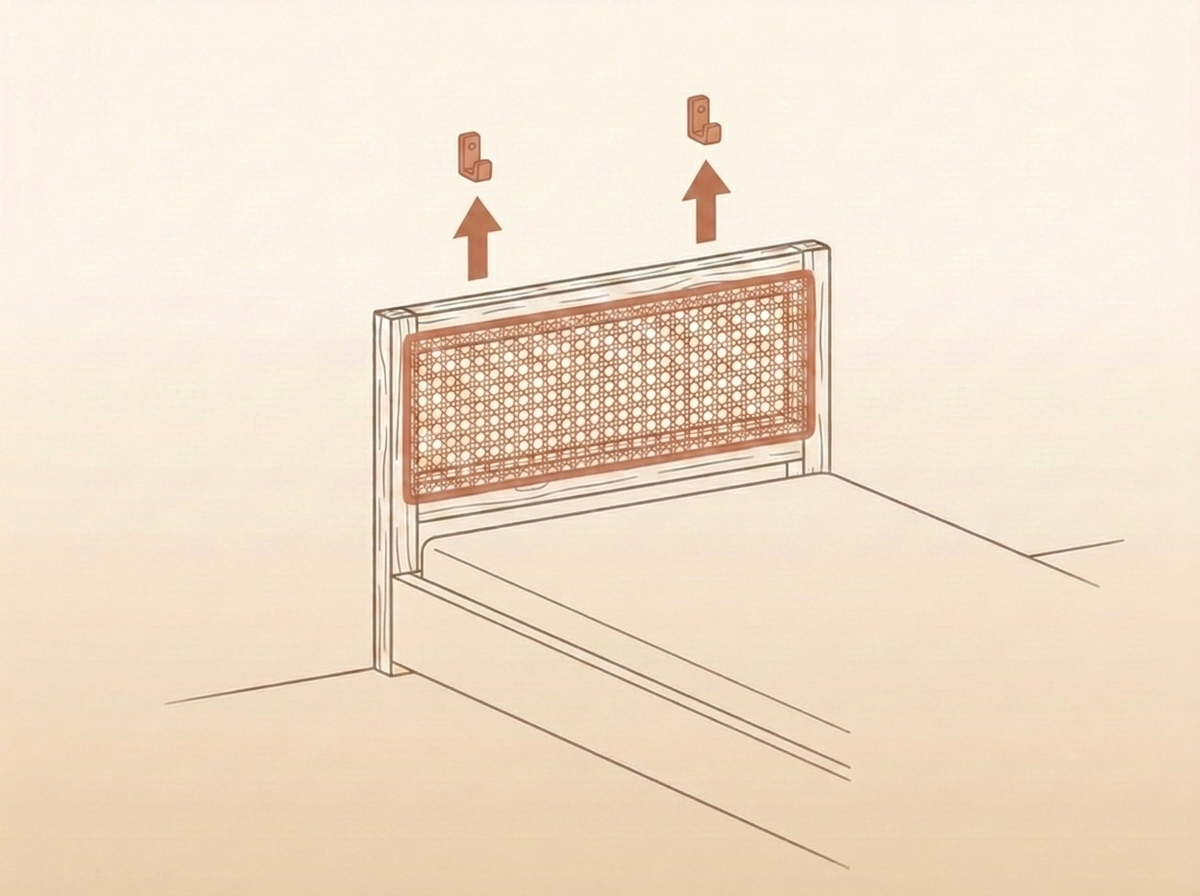
Mount it behind the bed
Hang the frame with two suitable fixings (wall plugs to match your wall), bottom edge ~50-60 cm above the mattress. No drilling? Just stand it behind the bed, leaned against the wall.
The detail that changes everything
The secret to crisp caning is tension: soak it before stapling and stretch it from the centre to the corners. As it dries it tightens and turns smooth like a real workshop headboard.
Where does it look best?
In a bedroom of course, but the same caned frame also makes a beautiful room divider or wall panel. It pairs with linen, light wood and warm tones, the 2026 trend. Just avoid prolonged direct sun, which dries out the rattan.
Step-by-step inspired by a tutorial spotted on YouTube. Mind the staples and the blade when trimming the excess.
Try it right at home
Snap a photo of your space and preview the result in seconds. Plus find all our decor tutorials on the app, and much more.