DIY · été
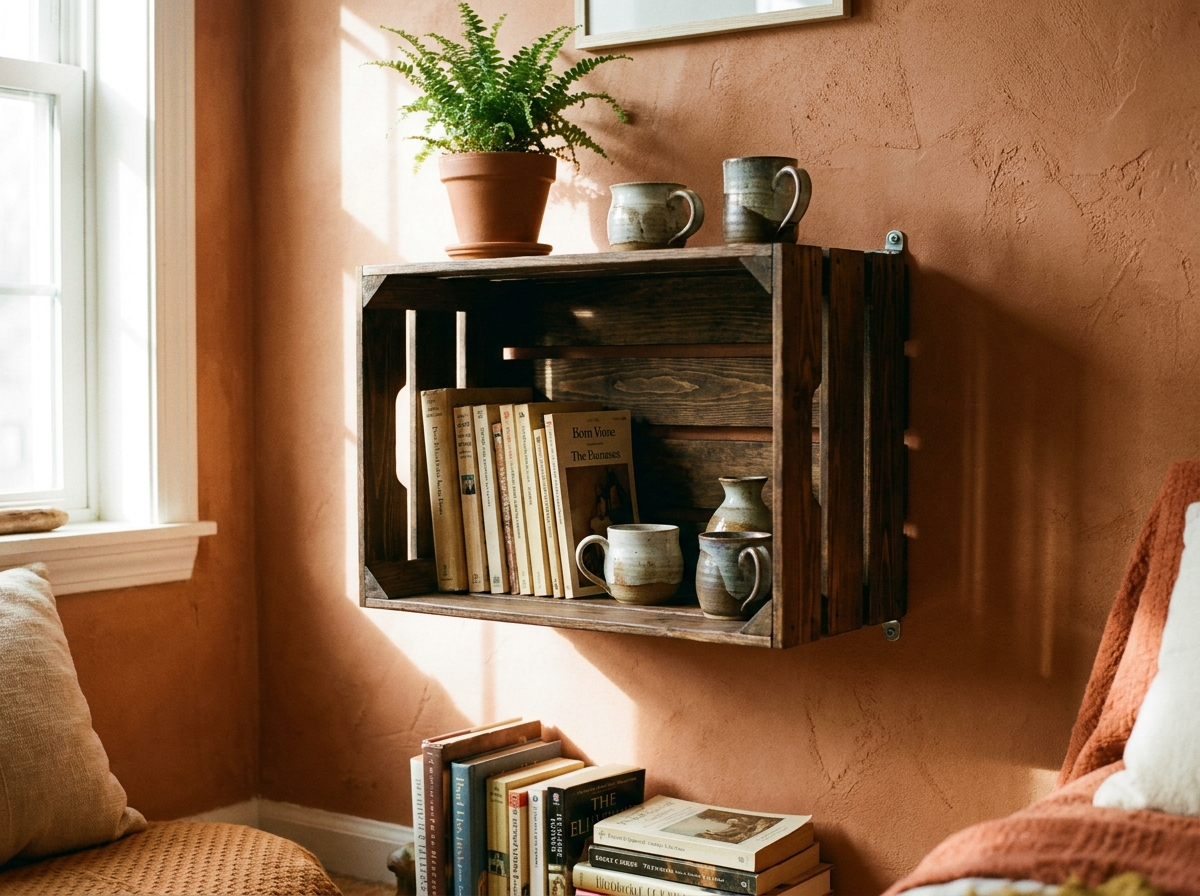
A decorative shelf from a simple wooden crate
 Reference tutorialToi-Même Tu FaisSee the tutorial →
A wooden crate is the most versatile salvage item there is: sanded and stained, it becomes a charming shelf for almost nothing. The perfect beginner DIY. On each diagram below, the highlighted zone shows the current step.
What you need
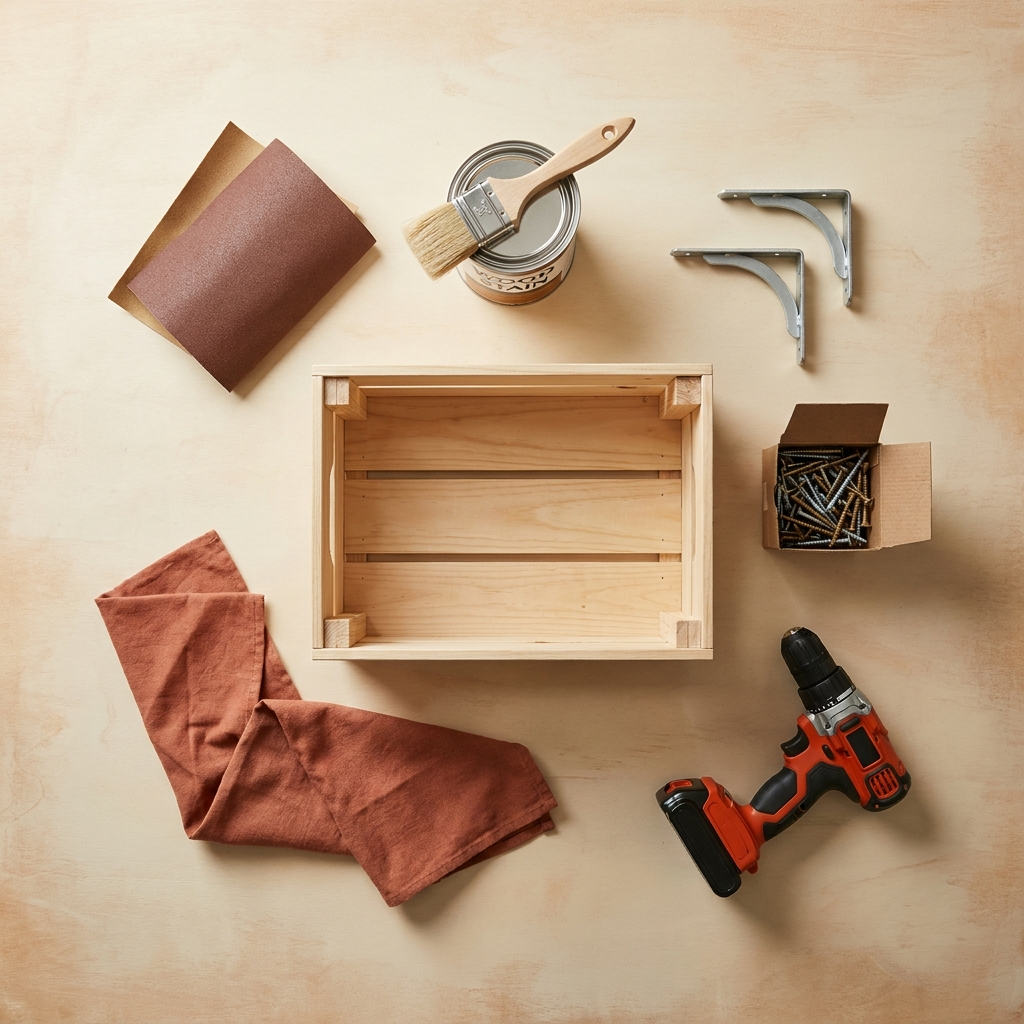
- A wooden crate (reused or ~€5)
- Medium + fine sandpaper
- Stain, oil or paint (~€6)
- 2 brackets + screws + wall plugs
- Drill-driver, level, pencil
Step by step
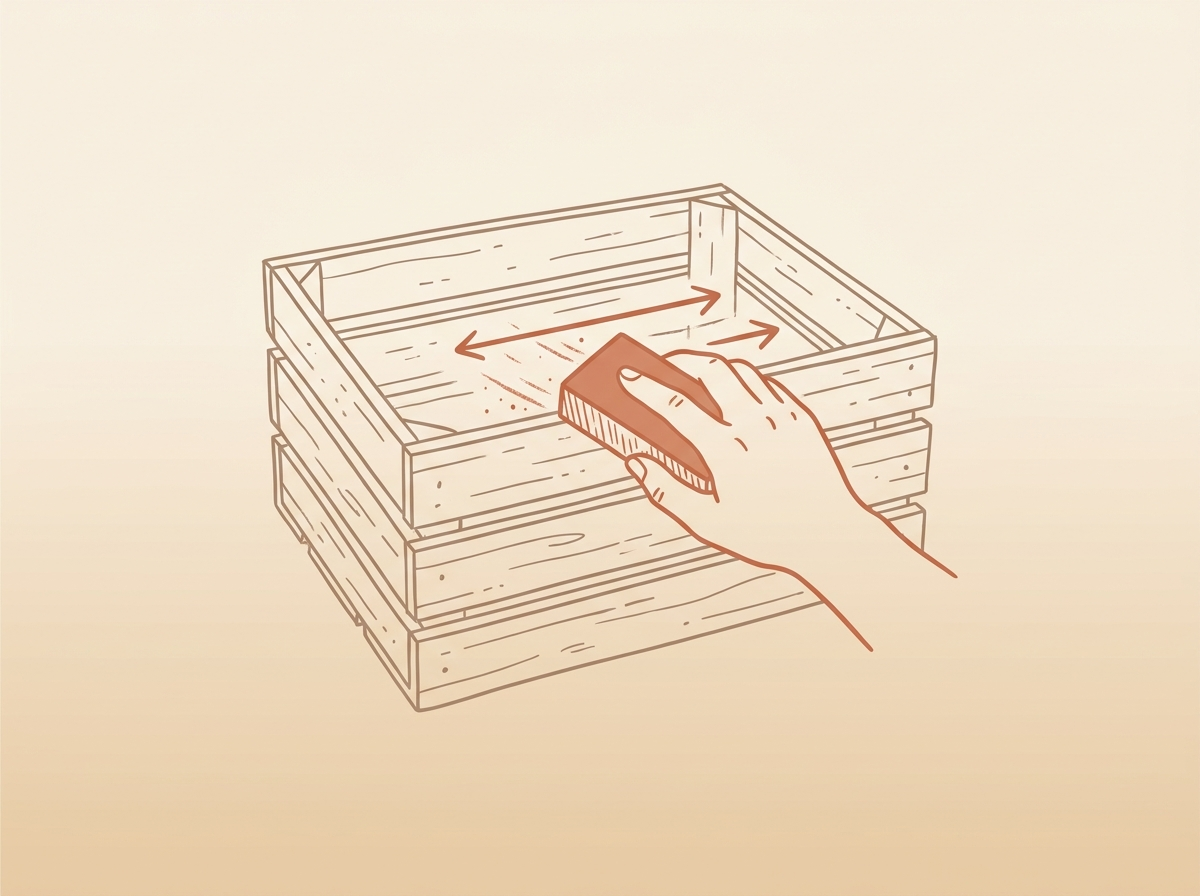
Sand the crate
Pick a sturdy crate (light-wood fruit crates are perfect). Sand it well with medium then fine grit, especially edges and inside, to remove splinters and prep the finish.
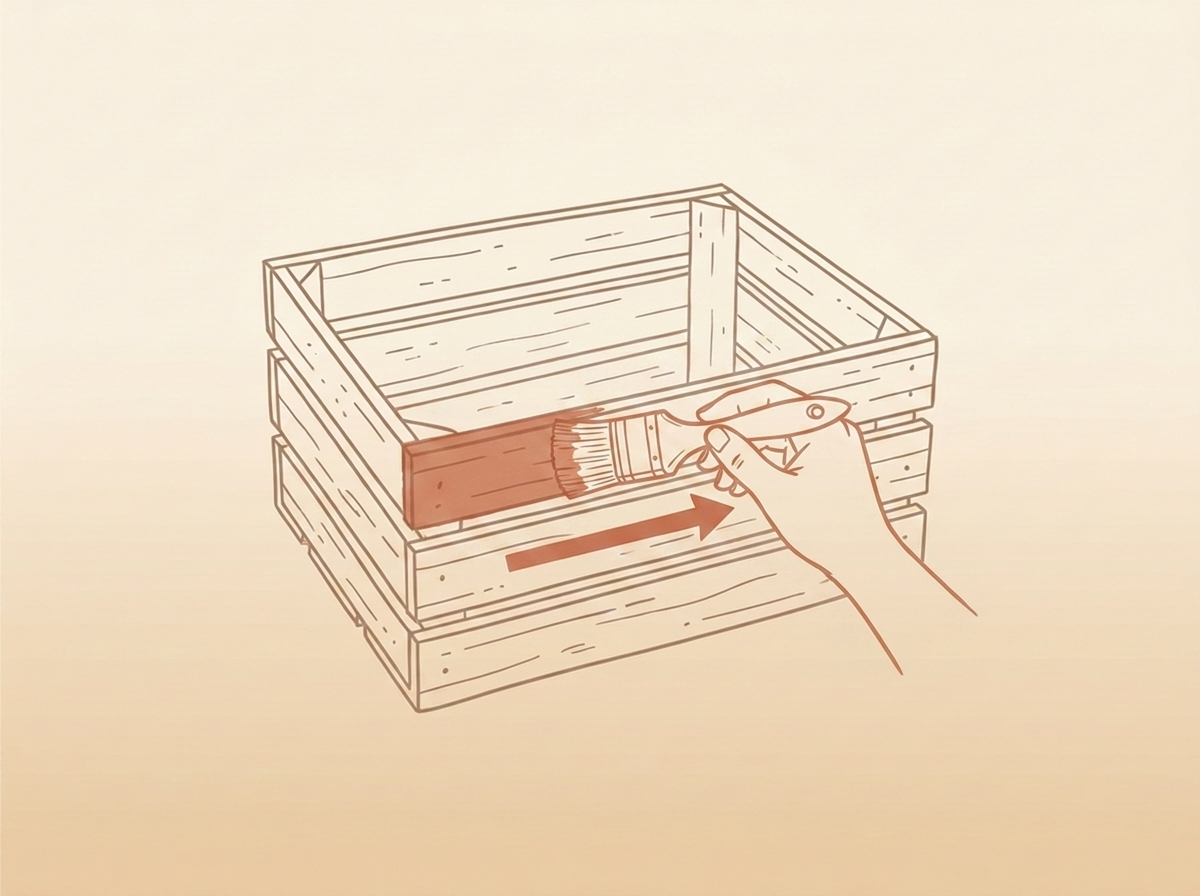
Stain or paint
Apply stain to warm the wood, oil for a natural effect, or paint for a touch of colour. One or two coats, drying between. This takes the crate from 'salvage' to 'decor'.
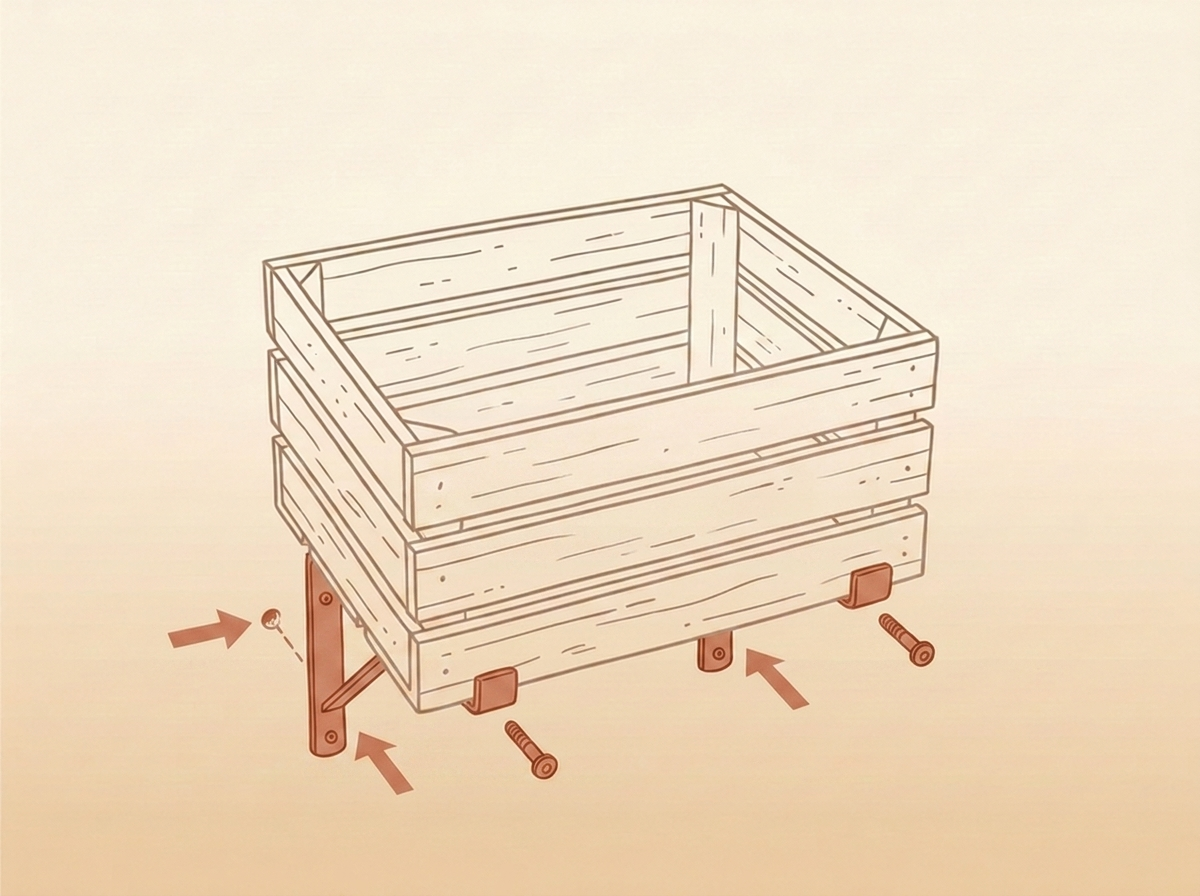
Mount on the wall
With the spirit level, draw the horizontal, drill and insert wall plugs suited to your wall, then screw the crate on via two brackets (or straight through the back). Check it's solid before loading: a shelf must hold the weight.
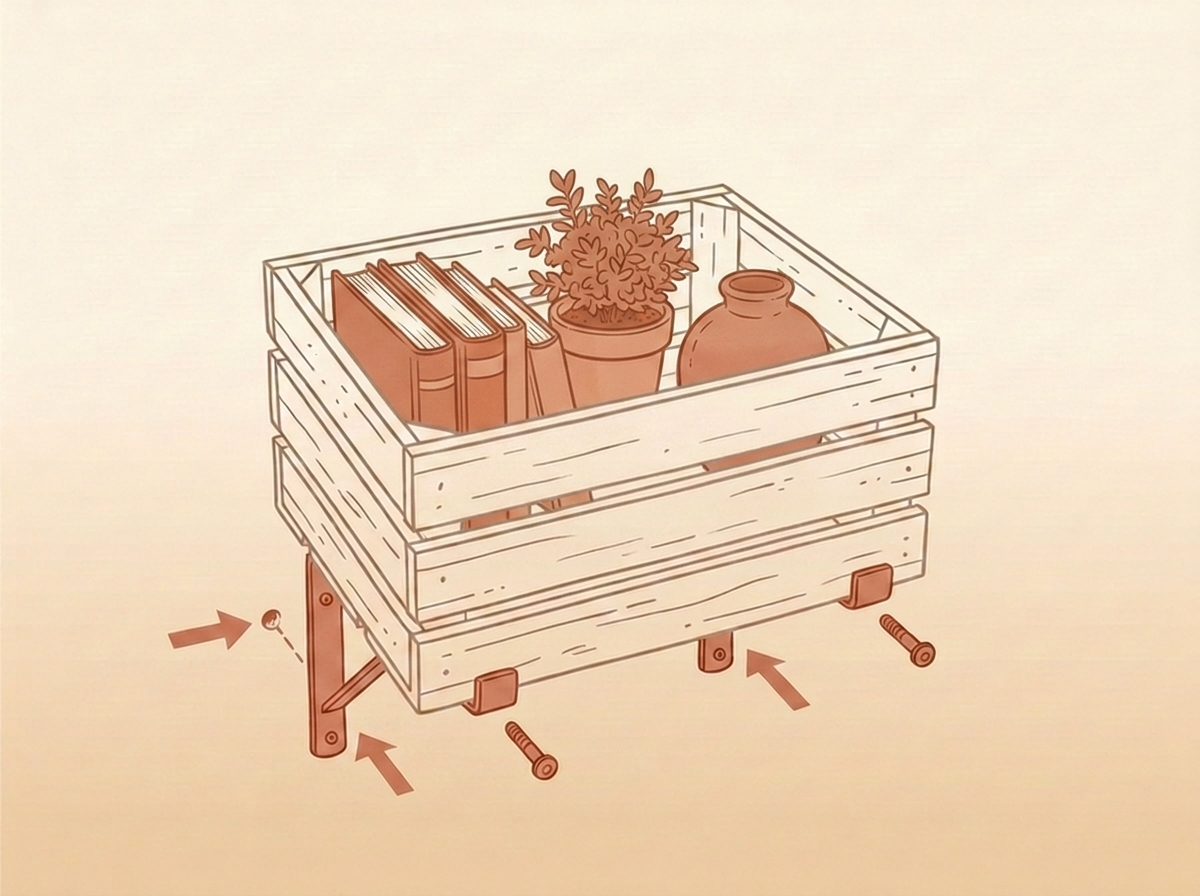
Style it
Fill without overloading: a few books, a small plant, a decor object. The rule of threes works well. You can also line up several for a modular bookshelf, or stand one vertically as a cubby.
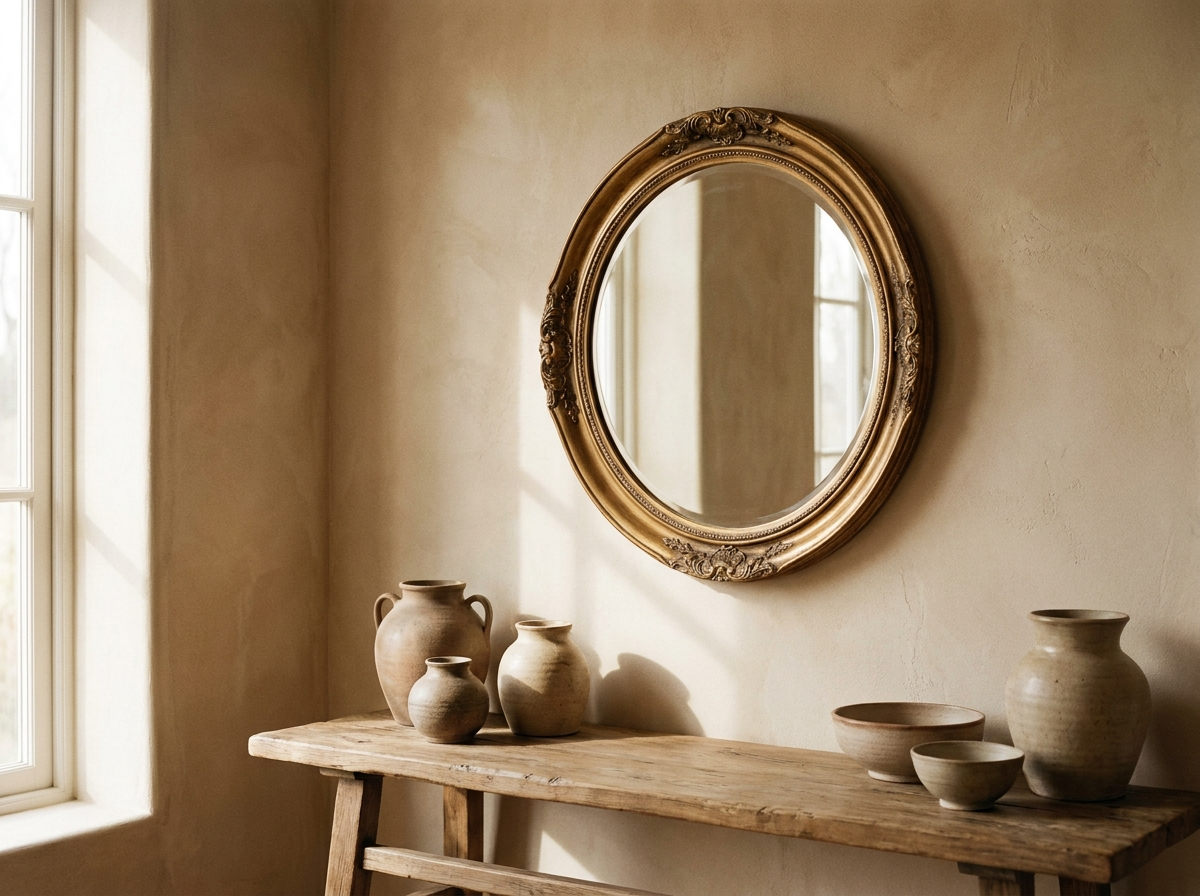
The detail that changes everything
It all comes down to the finish: a raw crate looks like a 'market box', a well-sanded and stained one looks like a 'decor shelf'. Don't skip sanding the edges, it changes the feel and the look.
Where does it look best?
In an entryway, a kitchen, a child's room or a home-office corner. Play modular: several crates lined up or offset form a custom bookshelf. Mind the weight: for books, solid fixings are a must.
Step-by-step inspired by a tutorial spotted on YouTube. Check for cables before drilling.
Try it right at home
Snap a photo of your space and preview the result in seconds. Plus find all our decor tutorials on the app, and much more.